LabVIEW on Linux and Mac OS

Yannic Risters
Some time ago, I worked on an application that was required to run on a Windows, Linux, and Mac operating system (OS). Consequently, I also had to work in the corresponding LabVIEW development environments regularly. From my point of view, this was quite interesting since I only had worked with LabVIEW on Windows up to that point.
The development of LabVIEW was inspired by the graphical interface of Apple’s Macintosh. Therefore, it may be obvious to assume that LabVIEW is still used on Mac OS. But how straightforward is it actually to use LabVIEW in Mac OS, compared to Windows? And how about LabVIEW on Linux? Let’s take a look at it.
Starting with Linux
Linux - Availability and compatibility
As you may know, there is a huge family of Linux distributions including Debian, openSUSE, Red Hat, Slackware, and Ubuntu. So, the first question you may ask is which Linux distribution and LabVIEW versions are compatible with each other.
NI published some information in this regard. In general, OpenSUSE, Red Hat Enterprise Linux, CentOS, and Scientific Linux are mentioned as compatible Linux distributions. However, this also depends on which versions of LabVIEW and the Linux distributions you want to use:


Furthermore, you need to take into account the bitness. From July 2016 on, there is only support for 64-bit versions of LabVIEW and Linux distributions. When taking a look at the download page for LabVIEW, you will see that you can still download and install 32-bit versions of the LabVIEW Runtime environment for earlier releases, like LabVIEW 2015.
For LabVIEW 2016 and 2017, there are also 32-bit versions available for the Full and Professional development systems. But from LabVIEW 2018 onwards, there are only 64-bit versions available.
Also, note that the Base Development System is not available for Linux and that you can only get the Full or Professional Development Systems for commercial and academic use. However, the LabVIEW Community editions 2020 SP1 and 2021 are available for Linux distributions.
Linux - Installation
NI provides a general description of how to install LabVIEW on Linux. Nevertheless, I would like to show you how I managed to install LabVIEW on Linux.
Suppose you use CentOS 7 as a Linux distribution and you'd like to install LabVIEW 2021 Professional (also assuming that you have a valid license). The following steps present one possible way to do that:
First, log in to the NI website, browse to the download section, and download the iso file.

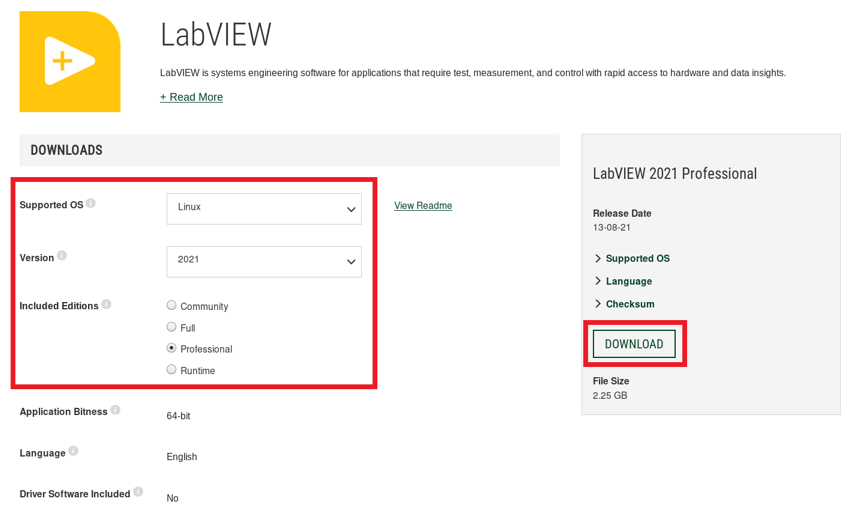
Second, browse to the location where the iso file was saved to (in this case, the “Downloads” folder), right-click on the iso file, and click on “Open With Disk Image Mounter” to mount it.

The mounted iso file will then be visible on the desktop.

Third, double-click on the mounted iso file, browse to the Linux iso file, and mount that one as well.
.PNG)
Now, two mounted iso files will be visible on the desktop.

Fourth, open the terminal and browse into the Linux iso file (in this case: 2021LVLinPro, located in the “run/media” directory of user “vitech”).

The Linux iso file contains an installation script called ”INSTALL”. You can see it by listing the content of the Linux iso file in the terminal or by opening the Linux iso file in the file browser.

Fifth, run the “INSTALL” script as root by using e.g. the “sudo” command.

Subsequently, you are asked to agree with the terms of the NI Software License Agreement and to indicate the components to be installed, like the LABVIEW Run-Time Engine or NI LabVIEW 2021 VI Analyzer Toolkit. If everything works out fine, LabVIEW is then successfully installed.

Note that, after the installation on Linux, LabVIEW does not ask for an activation code or serial number and you directly have full functionality. If you have a valid license, your NI.com account has been associated with an active-SSP serial number. This means that NI already verified your access to LabVIEW for Linux and Mac OS before downloading the software.
Linux - General Impression
When you compare LabVIEW 2021 on Linux with LabVIEW 2021 on Windows, you can see some slight differences. For example, the Linux version has a quite classic style whereas the Windows version looks new and up-to-date. In addition, both versions also have different lists of font styles that can be used by default.
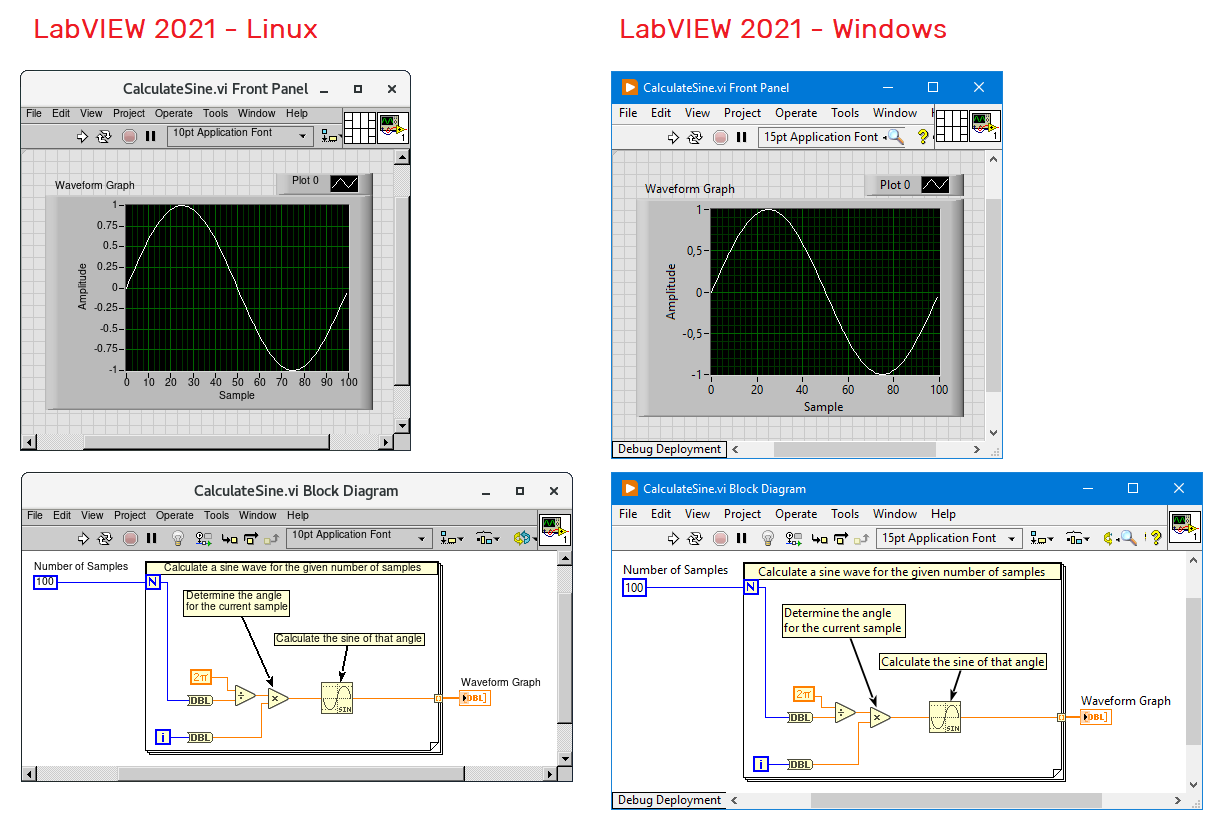
On the contrary, both versions seem to include the same functionalities. Even keyboard and Quick Drop shortcuts seem to work in Linux.
Linux - Configuration File
The Windows version of LabVIEW includes a .ini formatted configuration file called “Labview.ini”. In addition, the Linux version of LabVIEW also includes a configuration file called “labview.conf”. It is generally located in the “natinst.configLabVIEW ” directory.
.PNG)
There are different settings you could include in “labview.conf”. How about, for example, changing the background color of your block diagram from white to purple?

.PNG)
Linux - Installing drivers and packages
In Windows, you can use the NI Package Manager to install for example drivers. However, the NI Package Manager is only available for Windows and this means that drivers need to be installed differently when working in Linux. But how can you do that?
Suppose that you would like to install the NI-VISA driver on your CentOS 7 system. The first thing you may want to check is which driver version is compatible with your Linux version. NI actually provides some information in that regard.

The next step is to download the package from the NI website (in this case, it was chosen for NI-VISA version 18,2).
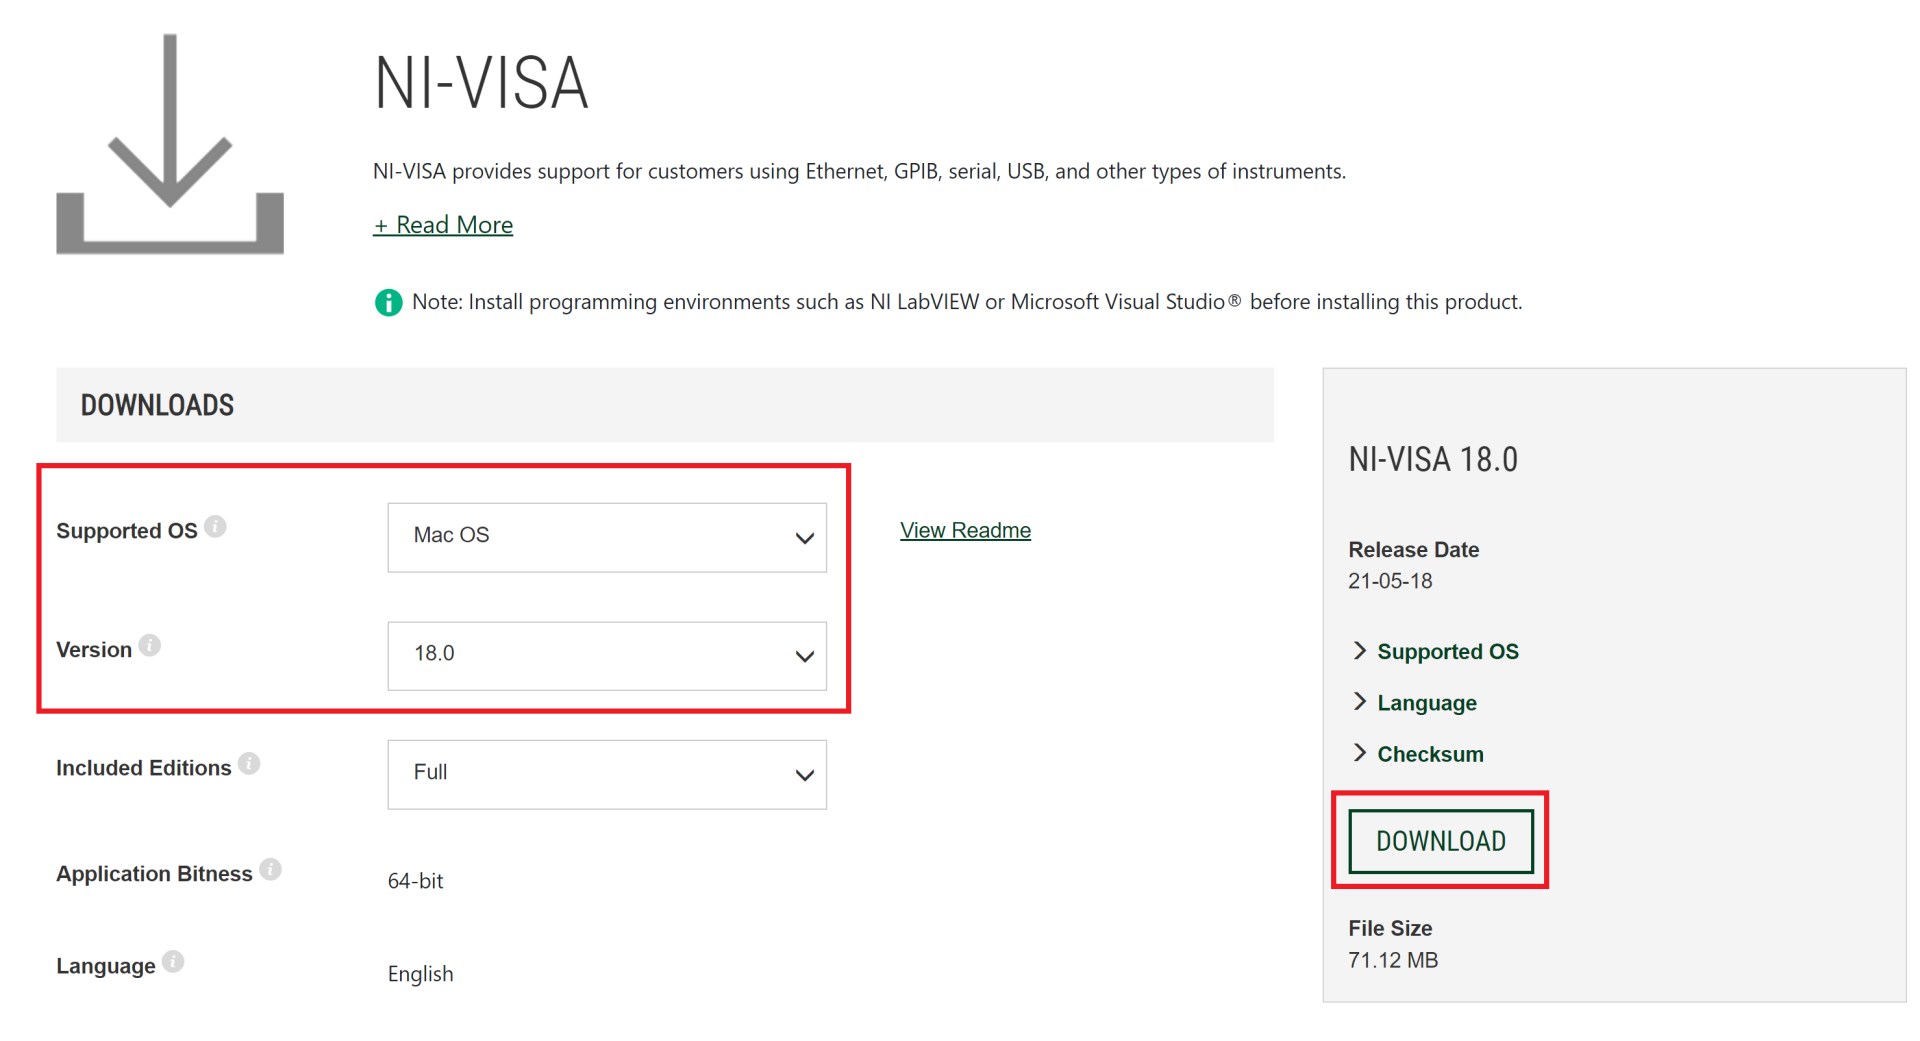
By doing this, you will obtain a .zipg file. Extract its content such that the right package is accessible (in this case, “rpm_RHEL7CentOS7.rpm”).

Subsequently, you can install the package for example by using the “sudo yum install” command. If everything works out fine, the package is then successfully installed.

Considering the installation of packages, it may be good to know that JKI’s VI Package Manager (VIPM) is also available for Linux. This makes it relatively easy to install packages and add-ons. The only thing you need to take into account is if the package you want to install is compatible with Linux (or “All”, as indicated for the DQMH package).

Linux - Building executables and installers
When you open a LabVIEW project and check the options of the Build specifications, you can see that you can build among other things an application but no installer.
.PNG)
The reason for not being able to build an installer lies in the fact that Linux generally does not work with installers but packages. One workaround for this issue is to first build the application and then to use the “tar” command to group the application files. The resulting .tar file could then be distributed. In addition, you could consider writing an installer script, similar to the one used for installing LabVIEW 2021 on Linux, to place the content of that .tar file in the right location. But that is something you would need to do outside of the LabVIEW environment.
Let’s talk about Mac OS
Mac OS - Availability and compatibility
Considering the installation of LabVIEW on Mac OS, it is also important to know which Mac OS and LabVIEW versions are compatible with each other.
NI published some information in this regard. In general, the operating systems between Mavericks and Big Sur are mentioned as compatible with specific LabVIEW versions:
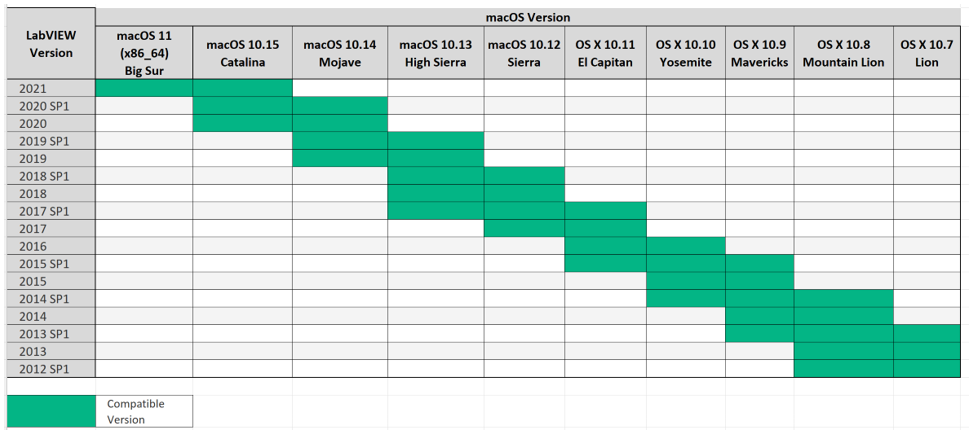
In contrast to Linux, the bitness does not seem to be a huge topic for Mac OS. When taking a look at the download page for LabVIEW, you will see that you can only download and install 64-bit versions of LabVIEW 2015 and newer.
Mac OS - Installation
I tried to find the information from NI considering the installation of LabVIEW on Mac OS. However, I was only capable of finding a description of the download procedure. For this reason, I would like to show you how I managed to install LabVIEW on Mac OS.
Suppose that you have a MacBook Pro with Mac OS Sierra 10.12 and that you want to install LabVIEW 2018 Professional (also assuming that you have a valid license). The following steps present one possible way of how to do that.
First, log in to the NI website, browse to the download section, and download the iso file.
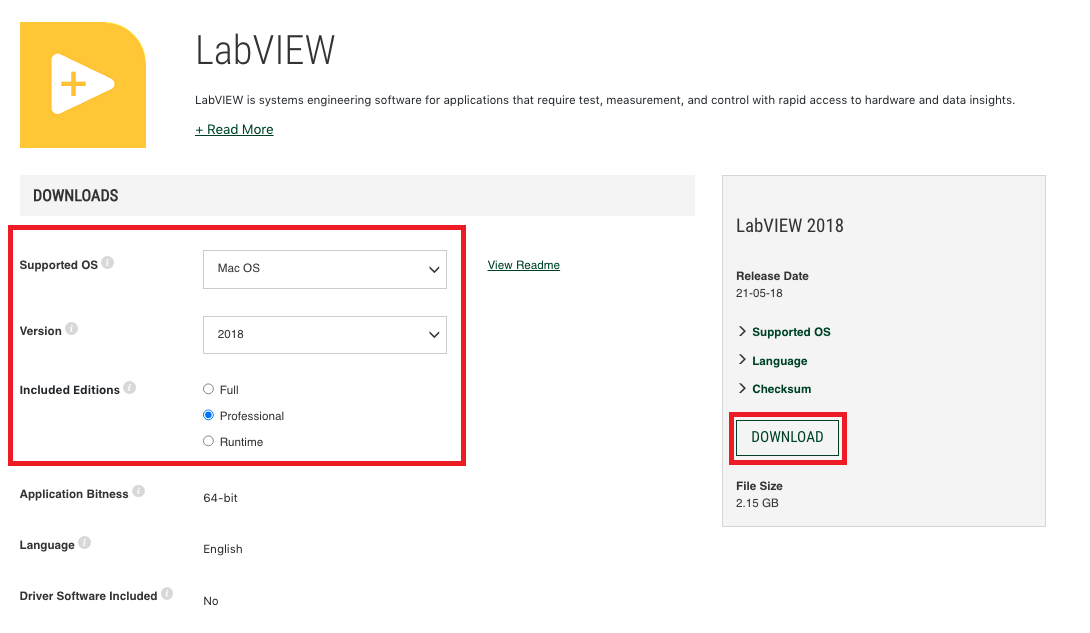
Second, browse to the location where the iso file was saved (in this case, the “Downloads” folder), right-click on the iso file, and click on “Open”.

The mounted iso file will then be visible on the desktop.
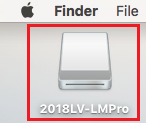
Third, double-click on the mounted iso file, browse to the .dmg file, and also double-click on it.

Now, the .dmg file will also be visible on the desktop.
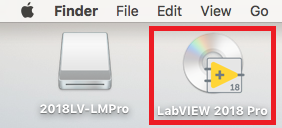
Fourth, double-click on the .dmg file, and then double-click on the installer. This will open the installer window.

Fifth, double-click on the installer icon in the Installer window and follow the installation steps.
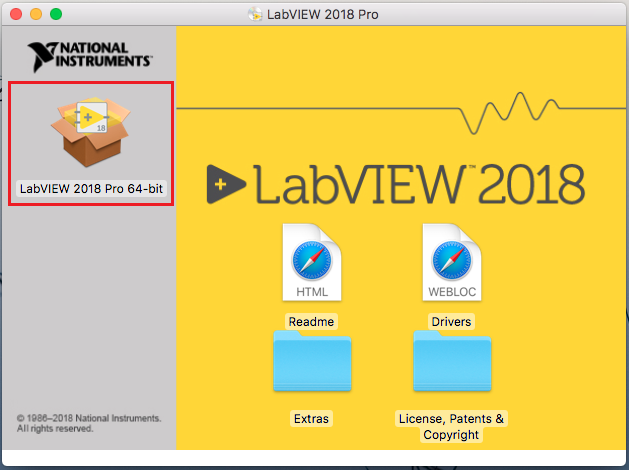
If everything works out fine, LabVIEW is successfully installed.

Note that, after the installation on Mac OS, LabVIEW does not ask for an activation code or serial number and you directly have full functionality. If you have a valid license, your NI.com account has been associated with an active-SSP serial number. This means that NI already verified your access to LabVIEW for Linux and Mac OS before downloading the software.
Mac OS - General Impression
When you compare LabVIEW 2021 on Mac OS with LabVIEW 2021 on Windows, you will notice that both versions appear to include the same functionalities. However, there are also some minor differences. In general, they have different styles according to the corresponding operating system. Furthermore, they also have different lists of font styles that can be used by default.

In addition, keyboard and Quick Drop shortcuts work slightly differently. Here are a few examples:

Mac OS - Configuration File
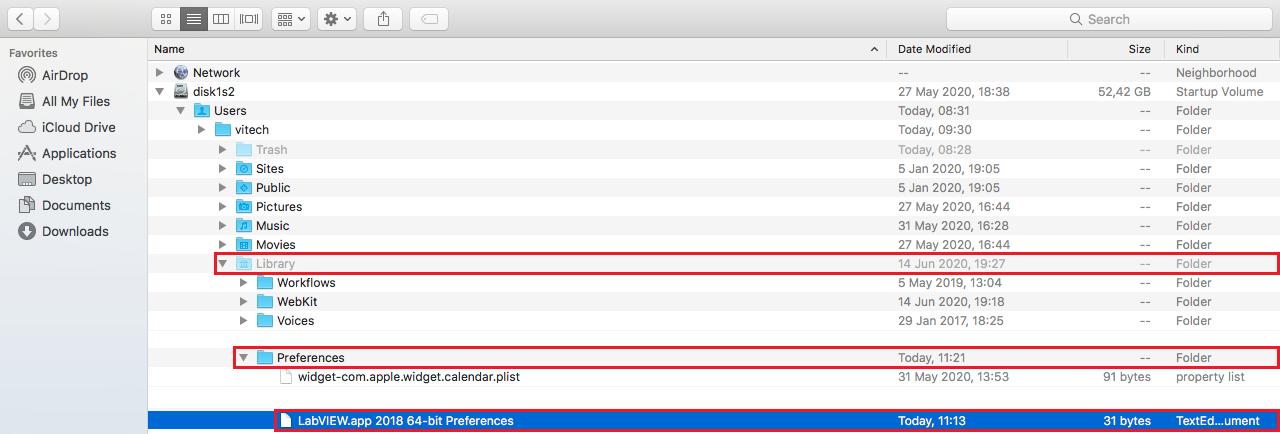
As you may expect, the Mac version of LabVIEW also includes a configuration file. According to NI, it is called “LabVIEW.app Preferences” and it is located in the “UsersLibraryPreferences” directory.
However, I initially struggled to find the configuration file. To begin with, I installed LabVIEW on a user account that has admin rights but that is not overall admin. At some point, I realized that I could only access and view the content of the “Library” directory within the overall admin account. Furthermore, it is also important to know that the “Library” directory is hidden and that you need to enable showing hidden files and folders with “Shift+Command+.”.
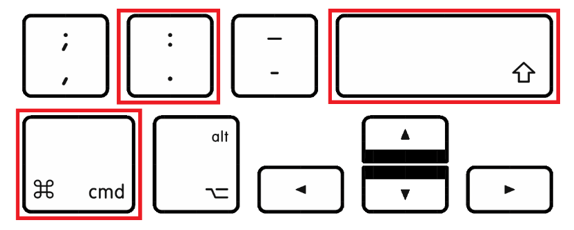
After keeping that in mind, I was able to find the configuration file.
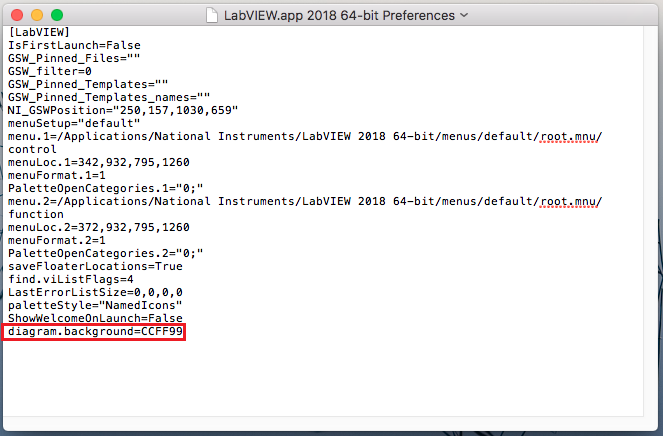
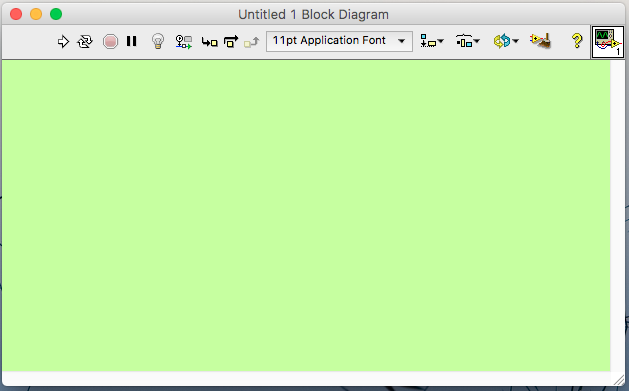
There are different settings you could also include in this configuration file, like changing the background color of your block diagram from white to green.
Mac OS - Installing drivers and packages
As previously mentioned, the NI Package Manager is only available for Windows. This means that for example drivers also need to be installed differently when working in Mac OS.
Suppose that you would like to install the NI-VISA driver on your Mac OS Sierra 10.12 system. The first thing you may want to check is which driver version is compatible with your OS. NI actually provides some information in that regard.

The next step is to download the package from the NI website.

By doing this, you obtain a .dmg file. Double-click on it to get access to its content.

You will then find a .pkg file. Double-click on it to start the installation and follow the installation procedure. If everything works out fine, the package is successfully installed.

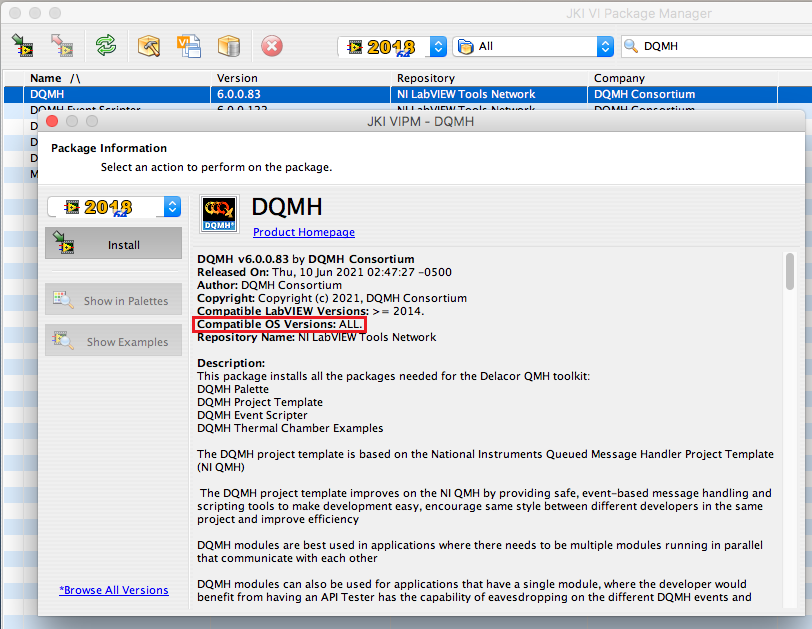
Considering the installation of packages, it may be good to know that JKI’s VI Package Manager (VIPM) is also available for Mac OS. This makes it relatively easy to install packages and add-ons. The only thing you need to take into account is if the package you want to install is compatible with Mac OS (or “All”, as indicated for the DQMH package).
Mac OS - Building executables and installers
When you open a LabVIEW project and check the options of the Build Specifications, you can see that you can build among other things an application but no installer.
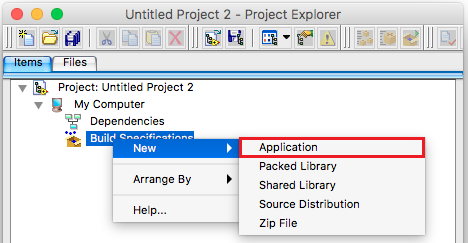
Similar to Linux, the Mac OS generally does not work with installers but packages. One workaround for this issue is to first build the application and then to use a Package Maker, included with Apple's Developer Tools, to create an installation package from the application files.
In Summary
In general, It seems to be possible to install and use LabVIEW on Linux and Mac OS. The installation procedures are different for both operating systems and also concerning Windows. But if you are familiar with Linux or Mac OS, that may not be a real problem.
The compatibility of specific LabVIEW versions, packages, and add-ons with the type and version of your OS seems to be a more important topic for Linux or Mac OS than for Windows systems.
It is possible to build LabVIEW applications in Linux and Mac OS in the same way as you may be used to in Windows. Building installers, however, is not possible since Linux and Mac OS work with packages. But there are possible workarounds for distributing your application.
In addition, it appears that LabVIEW in Linux and Mac OS includes the same basic functionalities as LabVIEW in Windows. However, it may be possible that certain aspects, like keyboard and Quick Drop shortcuts, work differently. Beyond that, I have to admit that I have not tested the Linux and Mac OS versions considering their stability, performance, bugs, etc. Thus, it may be possible that you could encounter difficulties and problems that I did not cover here.

